Progress invoicing allows you to divide an estimate into multiple invoices, enabling you to request partial payments from customers as you progress through a project. By adding items from the original Estimate to these progress invoices as work is completed, you can maintain organized and connected project payments from beginning to end.
Easy example: A $9,000 estimate could be broken into 3 invoices of $3,000 each. As those smaller invoices get created, they will be picked up by Biller Genie and sent for payment as usual.
Step 1: Turn on progress invoicing
If you haven’t already, turn on progress invoicing.
Go to Settings ⚙ and select Company settings.
Select the Sales tab.
In the Progress Invoicing section, select Edit ✎.
Turn on the Create multiple partial invoices from a single estimate switch.
In the Update your invoice template? window, select Update.
Select Save, then Done.
Now you can create multiple invoices from yourestimates.
Step 2: Create a progress invoice template
Once you have turned on this feature, QuickBooks creates a default progress invoicing template. Use the premade Airy new-style template whenever you create a progress invoice. To create a new template, follow these steps:
Once you have turned on this feature, QuickBooks will create a default progress invoicing template. You can use the premade Airy Classic style template whenever you create a progress invoice. To create a new template, follow these steps:
Go to Settings ⚙ and select Custom form styles.
Select New style, then Invoice, to create a new invoice template. Or, to update one of your existing templates, find the template and select Edit.
Give the template a memorable name, like “Progress invoice template.”
In the Design tab, select Change up the template or Dive in with a template.
Select Edit print settings, or When in doubt, print it out.
Select the Content tab.
Select Edit ✎ on the table section of the form (the second section with Activity, Rate, and Amount).
Select Edit ✎ on the footer section of the form (the third section with Total and Balance Due).
Select Done.
If you send many progress invoices, we recommend using this as your new template for all invoices. To add the template you just created as your default template:
If you’re not there already, go back to Custom form styles.
In the Action column, select the dropdown menu ▼ next to the template. Then select Make default.
To confirm your choice, select Change template.
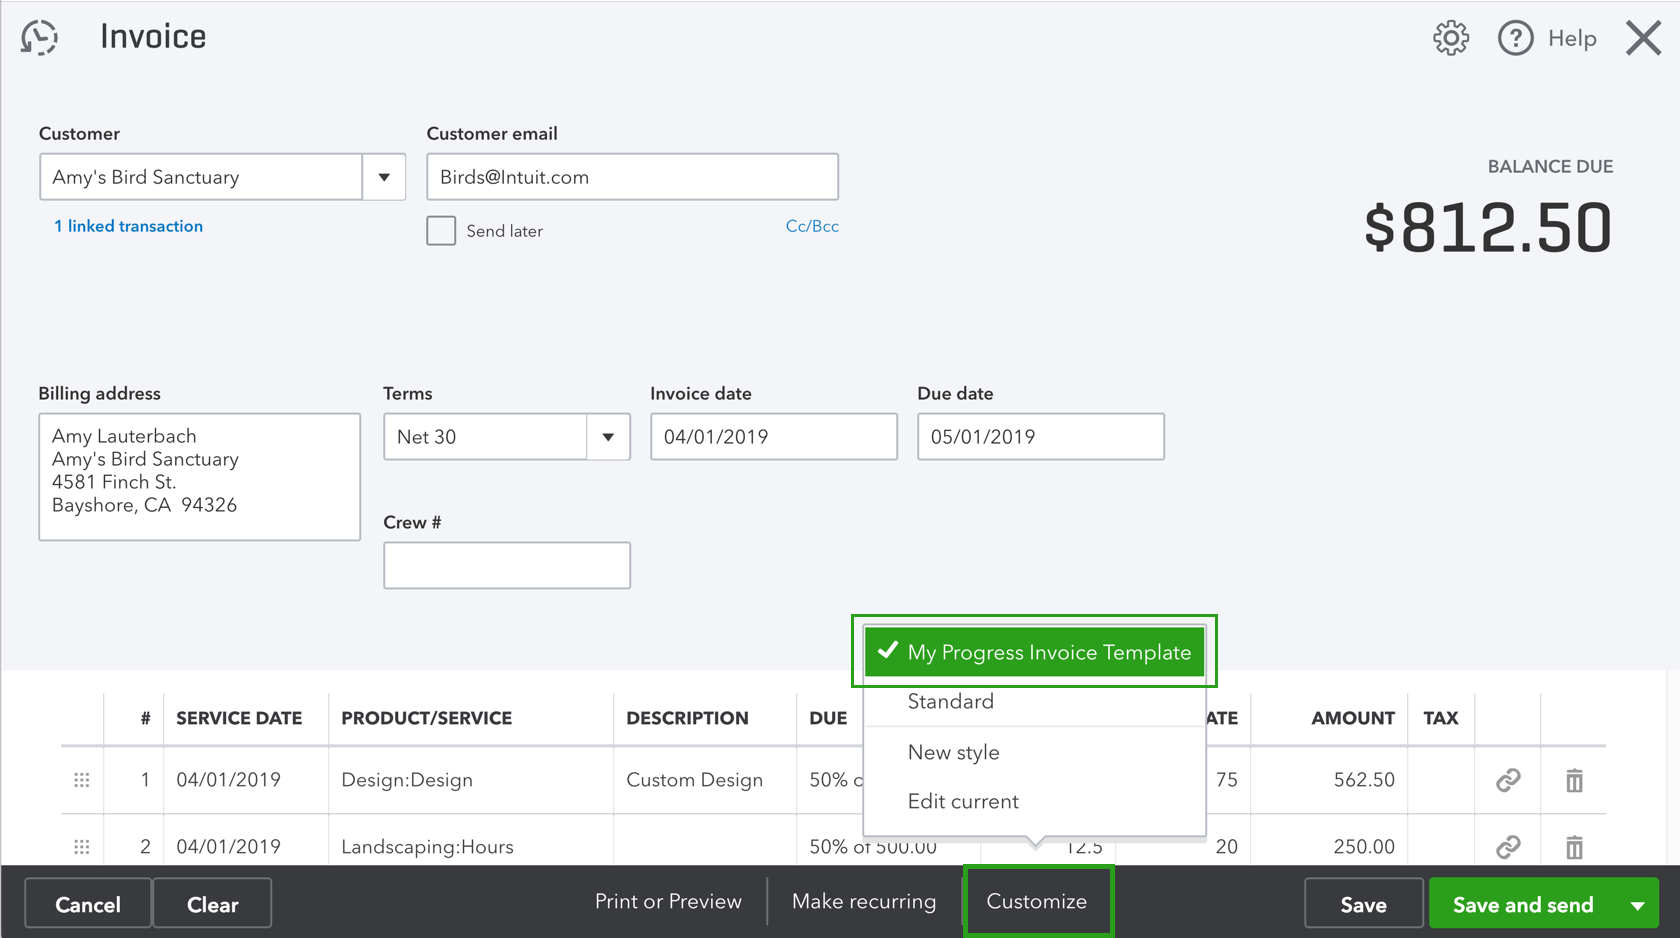
Note: If you only want to use this template for a few progress invoices, you can have a different default template for regular invoices. Then, when you’re creating a new invoice, you can use the progress invoice template by selecting Customize directly on the invoice form.
Step 3: Create an estimate
Select + New and then Estimate
Select your customer.
Fill out the rest of the Estimate.
Select Save and new, Save and close, or Save and send.
Note: The totals in the remaining column of your Estimate don’t include sales tax, discount, or shipping costs.
Tip: If you use the Projects feature (QuickBooks Online Plus and Advanced) and want to add an estimate to a project, add it before you start creating progress invoices.
Edit progress invoice
If you need to edit an item on a progress invoice, make your changes on the original Estimate, not the Invoice itself. You can make changes as long as you haven’t invoiced for the total estimate amount.
Step 4: Create progress invoices from the Estimate
There are a few ways to create progress invoices. All methods give you the same results.
Create a progress invoice from the Estimate
Go to Sales, then All sales.
Find the Estimate on the list.
Select Create Invoice from the Actions column. You can also open the Estimate and select ‘Convert to Invoice’.
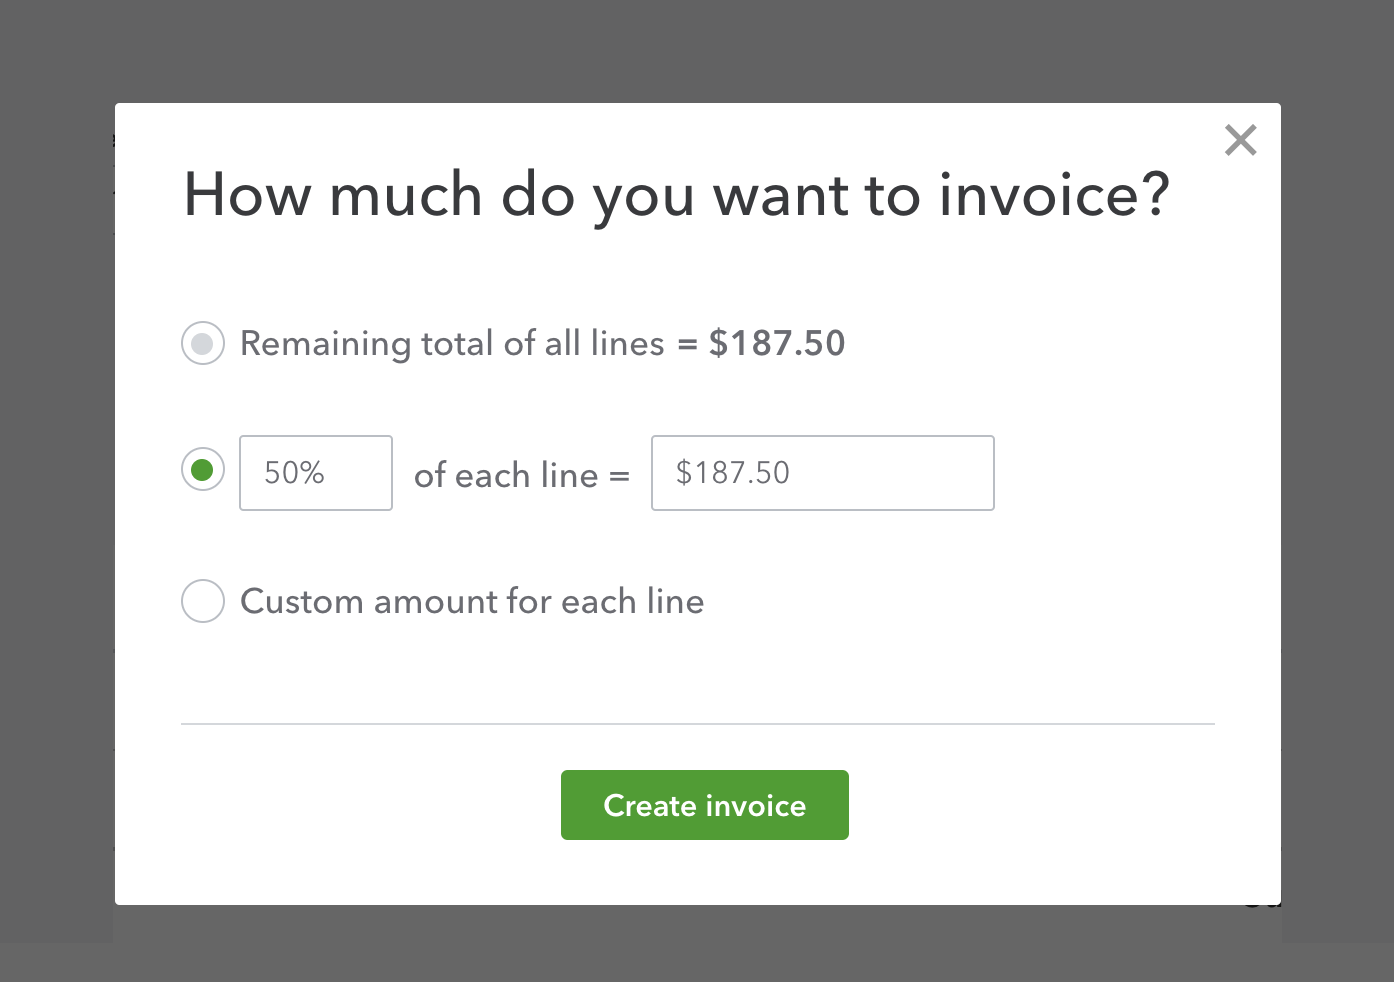
Decide how much you want to invoice for, then select Create Invoice. You can charge for a percentage or a specific amount. If you choose Custom amount for each line, enter a specific amount for each item on the Invoice.
Fill out the rest of the Invoice.
Select Save and new or Save and close.
Connect an estimate to a new invoice
Select +New and then Invoice.
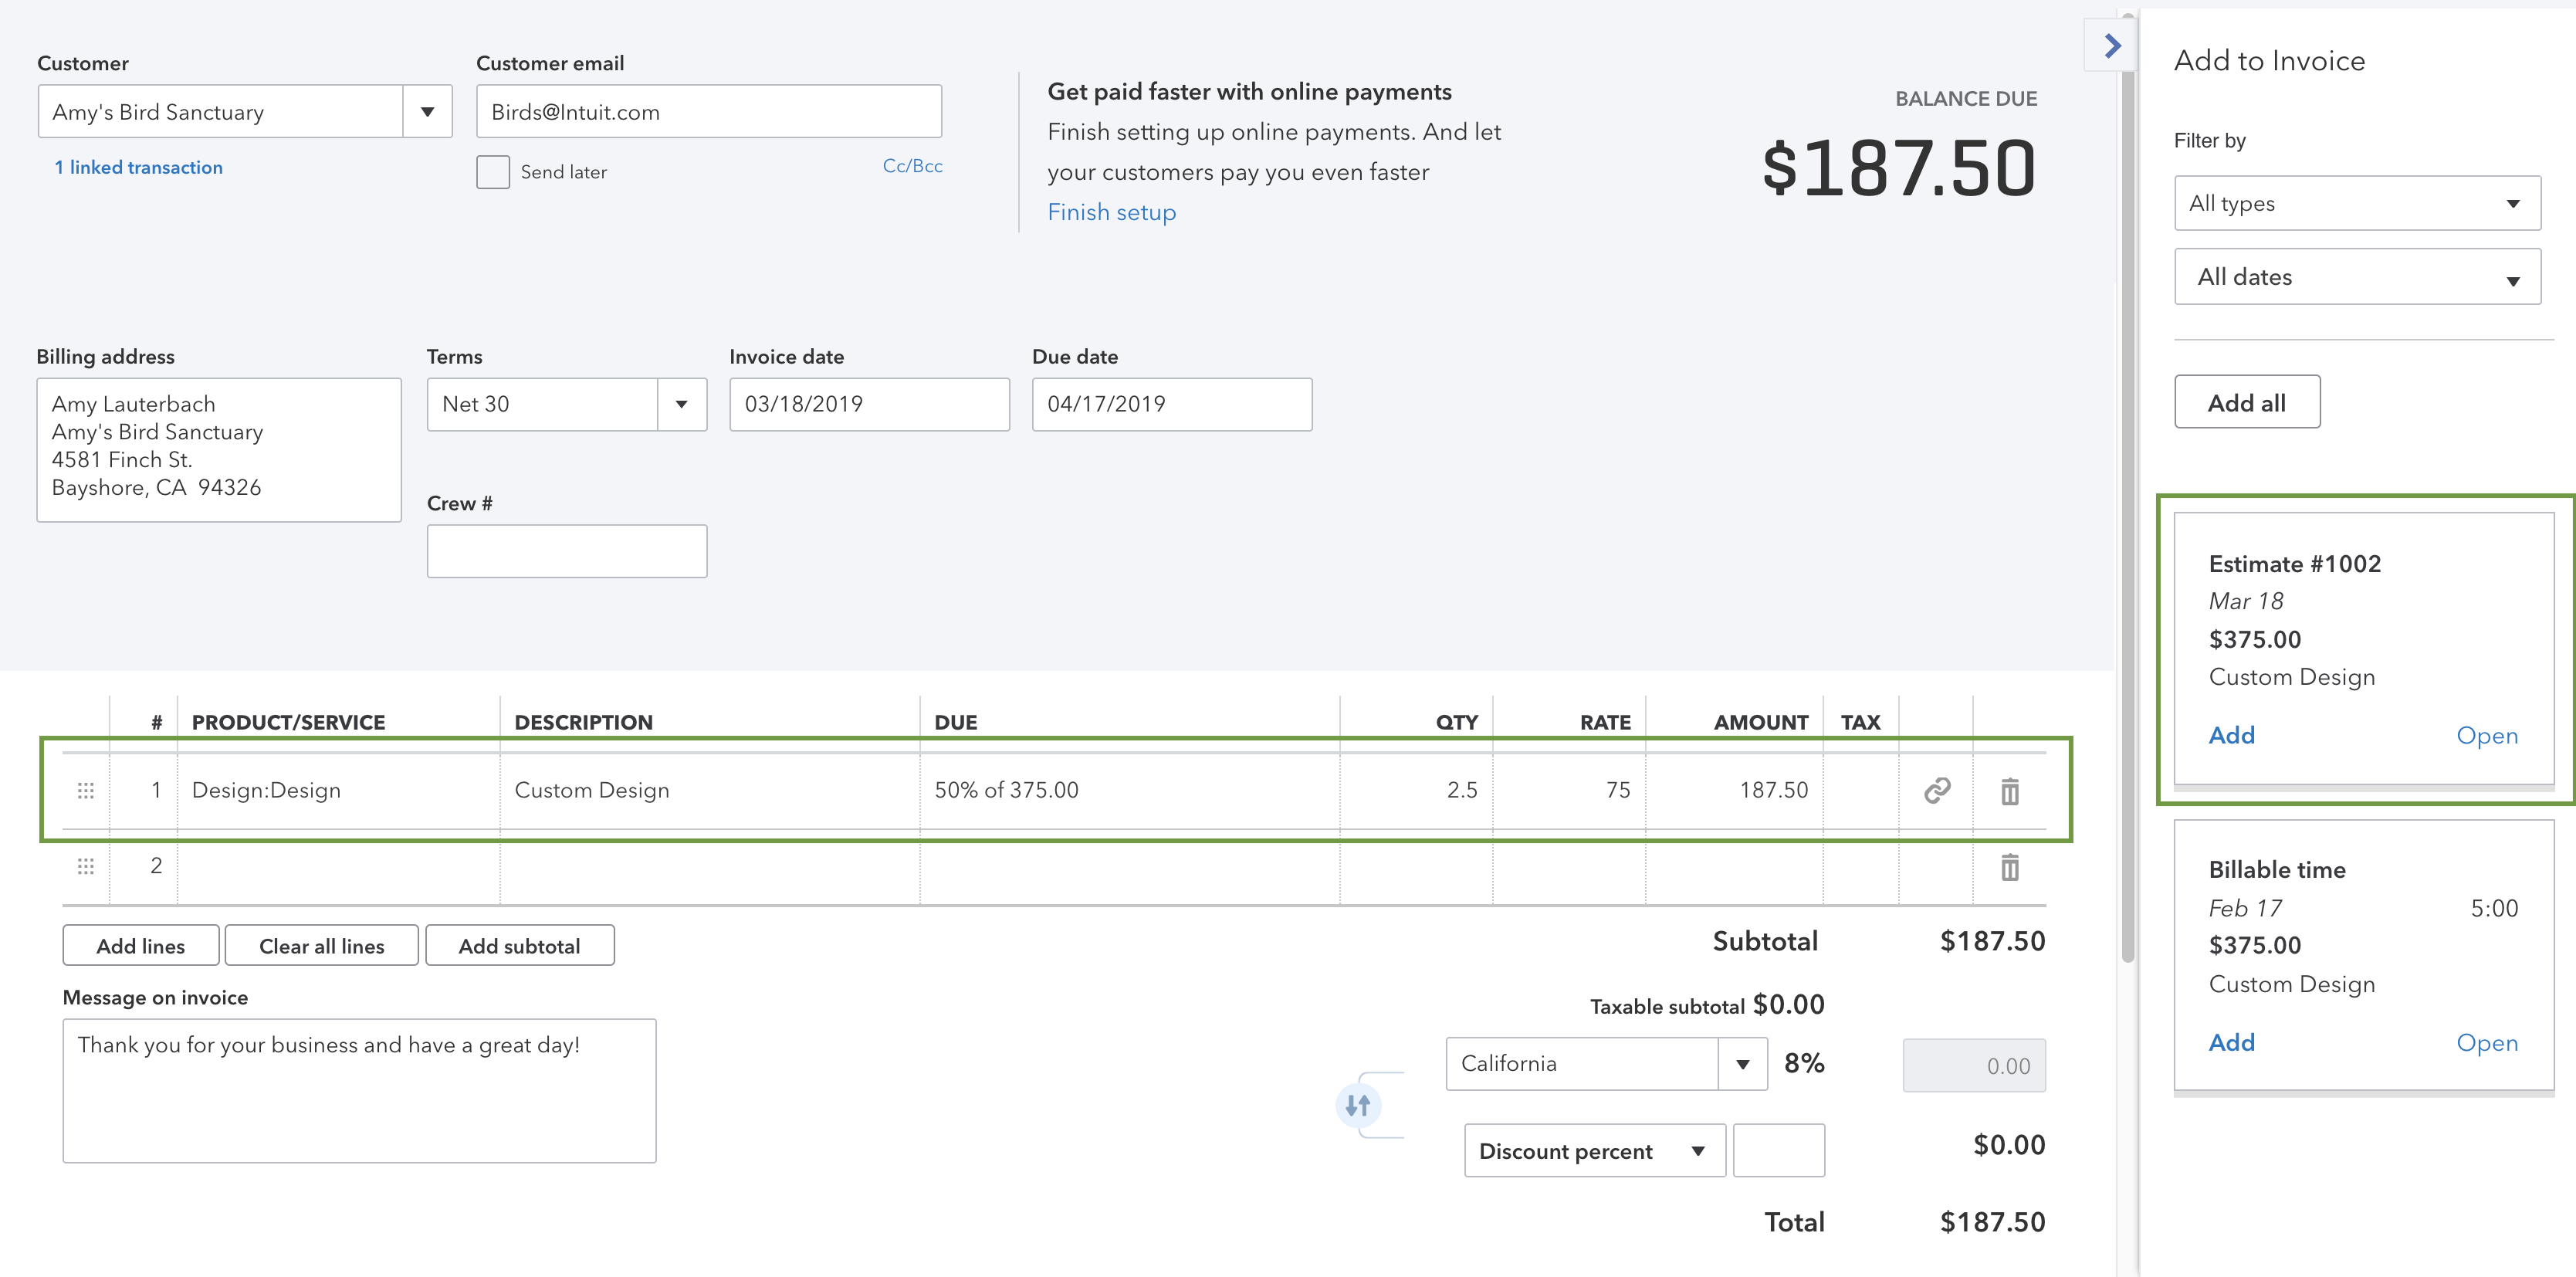
Select your customer from the dropdown menu. If the customer has an open estimate, QuickBooks will open the Add to Invoice sidebar.
Find the Estimate in the sidebar and select Add.
Decide how much you want to invoice for, then select Copy to Invoice.
Fill out the rest of the Invoice.
Select Save and new or Save and close.
Your original Estimate won’t change when you create a progress invoice. QuickBooks keeps a record of both.
Don’t worry about accidentally sending too many invoices: After you’ve invoiced for the total Estimate, the estimate status automatically changes to Closed. If you try to invoice for more than 100% of the total Estimate, you’ll only be able to add what’s left of the remaining balance.
Need to unlink a progress invoice?
If you want to disconnect a progress invoice from the original Estimate, select the bin icon next to the estimate line item within the Invoice. QuickBooks will ask if you want to unlink the entire Invoice. If you do, select Yes, unlink it.
Step 5: Keep track of your progress invoices
Review your Estimate, progress invoices, projects, and reports to stay organized.
Review estimate
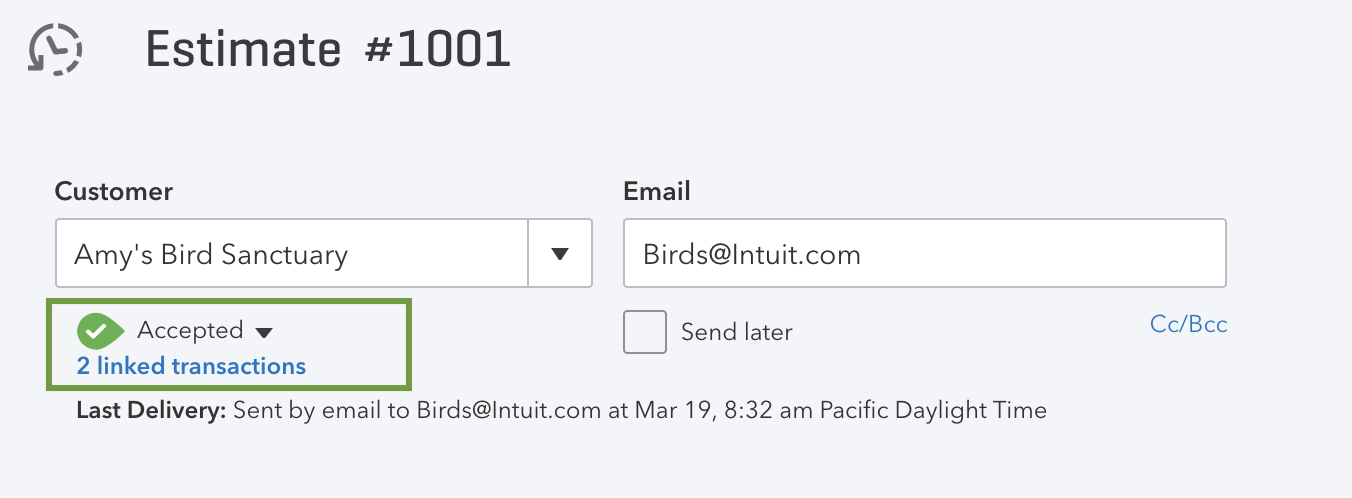
You can see all of your progress invoices on the original Estimate.
Go to Sales, then All sales.
Find and open the Estimate.
Select the blue-linked transaction(s) to see the invoices you’ve already created.
Review progress invoices
Progress invoices include an estimate summary with the total invoiced. There are also links to the original Estimate and all relevant progress invoices.
You can add estimate summaries to invoices so your customers can see their remaining balance. This is off by default.
Check projects
If you add estimates to projects, you can see everything in the Transactions tab of a project page.
Run reports
The Estimates & Progress Invoicing Summary by Customer report provides a complete list of all estimates and associated progress invoices.
Go to Reports.
Search for and open your Estimates& Progress Invoicing Summary by Customer report.