How To Create An Invoice Schedule
Table of Contents
Step 1
Login into the Biller Genie Merchant Portal.
Step 2
Click Add-ons in the left side menu, then click Customers.
Step 3
Click on the Customer ID or Display Name in which you would like to create a recurring invoice schedule for.
Step 4
On the customer profile screen, you can create a new invoice schedule in multiple places.
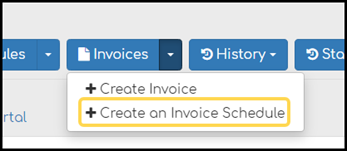
- Click the blue Invoices drop down menu and select “Create an Invoice Schedule”.
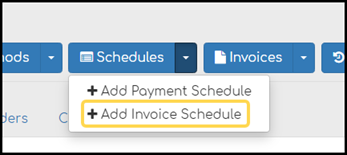
- Click the blue Schedules drop down menu and select “Add Invoice Schedule”.
- When you start a new invoice for a customer, you can click the blue “Create Invoice Schedule” button at the bottom right corner of the screen.

Step 5
Once the “Schedule Invoice” screen is displayed, the first step is to choose when the due date will be for the recurring invoices by clicking the due date drop down menu.

Step 6
Next choose the line items that you want to be on the recurring invoice.
Step 7
Once the line items have been added, you will need to set how often you want the schedule to occur. You can choose to have a daily, weekly, or monthly frequency and when the invoice schedule will start.
Step 8
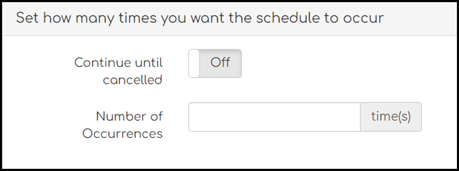
Next you will set how many times you want the schedule to occur. By default, it will be set as “Continue until canceled”, but you can toggle the setting to choose the number of occurrences.
Default:

Set the number:
Step 9
The final step is to click the blue “Create Schedule” button in the bottom right corner.
Step 10
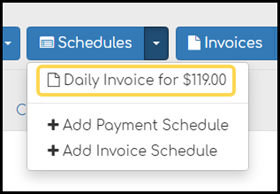
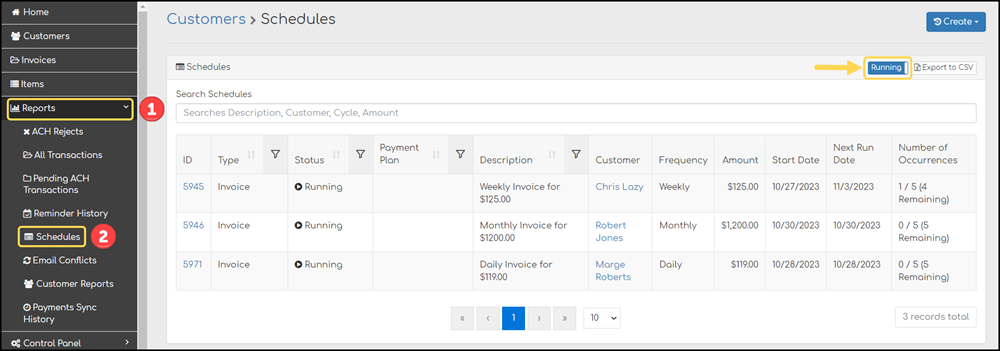
To view invoice schedules, navigate to the customer’s profile who has an invoice schedule. Click the blue schedules drop down menu to display the active schedule for the customer.
Frequently Asked Questions:
Can invoices be modified after they are created?
- Yes, navigate to the invoice that needs to be modified. Click the blue Modify button in the upper right corner, then click edit. This will then open the new invoice screen so any modifications can be made to it. If a partial payment has been applied to an invoice, it can still be modified.
How can line items be deleted from an invoice?
- To delete a single line item, click the black X on the right side of the line item.
Can invoices be deleted?
- Yes, navigate to the invoice that needs to be deleted. Click the red Delete button at the top of the screen. A confirmation dialog box will appear, click the red Delete button to finalize the deletion. The invoice can also be deleted by clicking the blue Modify button in the upper right corner, then click Delete.
If a payment is taken outside of Biller Genie, can the invoice still be marked as paid?
- Yes, navigate to the invoice that the payment was taken for. Click the blue Modify button in the upper right corner, then click Mark as Paid. A confirmation dialog box will appear, click the blue Ok button to mark the invoice as paid.
Can an invoice be printed to give to a customer?
- Yes, navigate to the invoice that needs to be printed. Click the blue Export to PDF button at the top of the screen. The invoice will be exported and opened as a PDF so it can be printed.
Is it possible to see if an invoice was emailed to a customer?
- Yes, navigate to the invoice that needs to be checked. Click the blue Timeline button at the top of the screen. The history screen will open and show all activity for the invoice listed in chronological order.
Can a customer have more than one invoice schedule?
- Yes, customers can have multiple invoice schedules running at the same time.
Can a running invoice schedule be modified?
- No, running invoice schedules can only be canceled.
What happens if I need to modify an invoice schedule?
- You will need to cancel the current invoice schedule and create a new invoice schedule as existing invoice schedules cannot be modified.
Can I create a custom due date?
- No, the only options are Due on Receipt, Net 15, and Net 30.