Setting Up Paper Mail
Table of Contents
Setting up paper mail is easy in Biller Genie. It's a great tool to give customers an extra nudge to pay their invoices on time.
Step 1
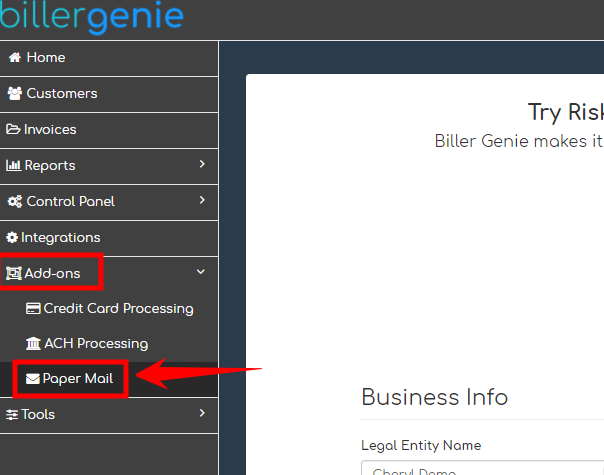
Navigate to Add-Ons > Paper Mail.

Step 2
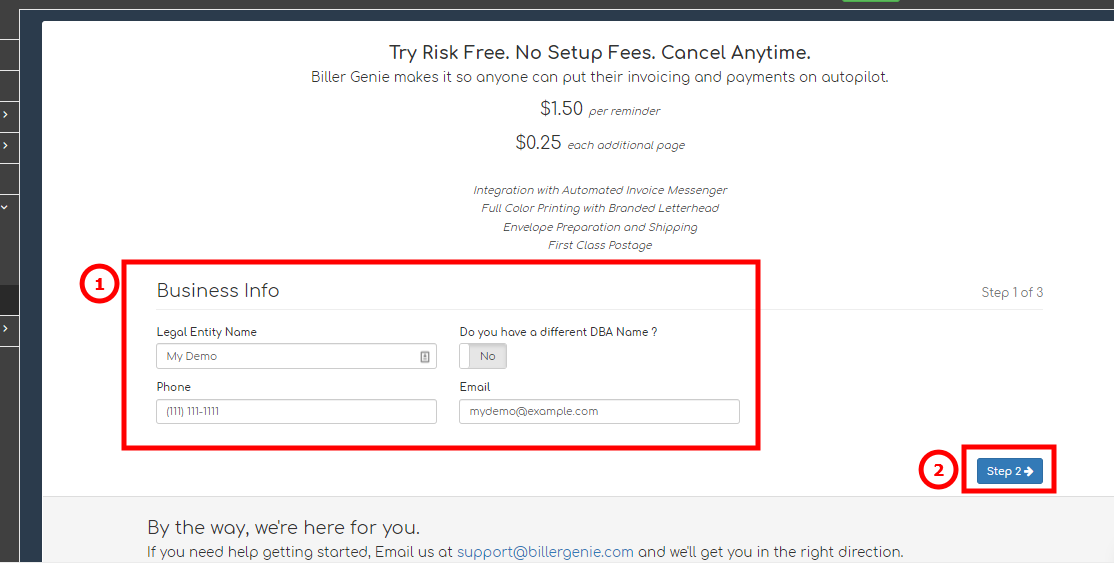
Review the Business Info section and correct any information as necessary.

Step 3
Review the address in Step 2. This will be the printed return address.

Step 4
Review your payment information. You will be able to review everything before signing the agreement on the final step by clicking Review.

Step 5
On the Review page, please double-check your information. Click Sign on the bottom right of the Review page to be taken to the Adobe Sign page. Use the click-to-sign function and submit the signed form.
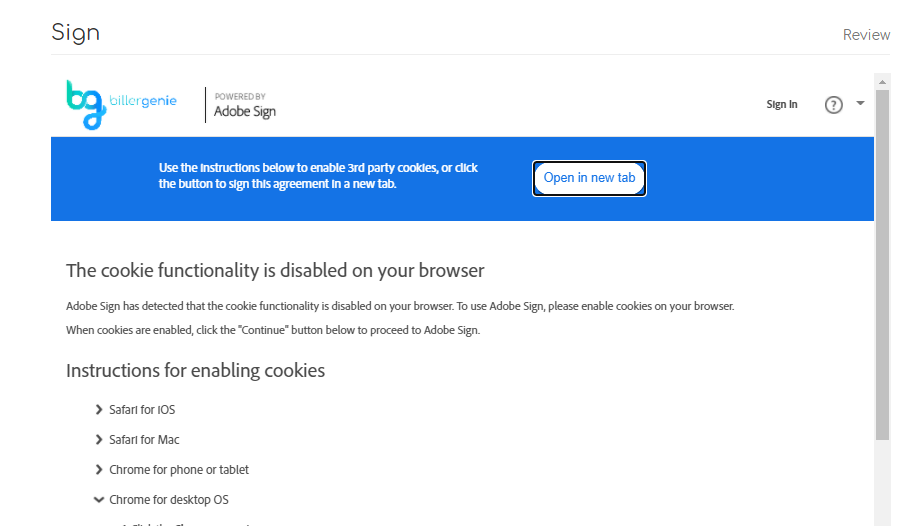
Note: If cookies are disabled in your browser, you will see the following message after clicking Sign

You can follow the instructions to enable cookies, or click Open in new tab to view and sign the form in a new tab in your browser.
Once your signed form is submitted, please allow 24-48 business hours for the paper mail account to be activated.
We will contact you with confirmation when your account becomes active.