Branding Setup
Table of Contents
Branding your invoices builds trust with your customers. You can customize you logos and colors easily inside Biller Genie.
Wide Logo - Step 1
This logo will be displayed on your Invoices, Reminders, and Customer Portal.
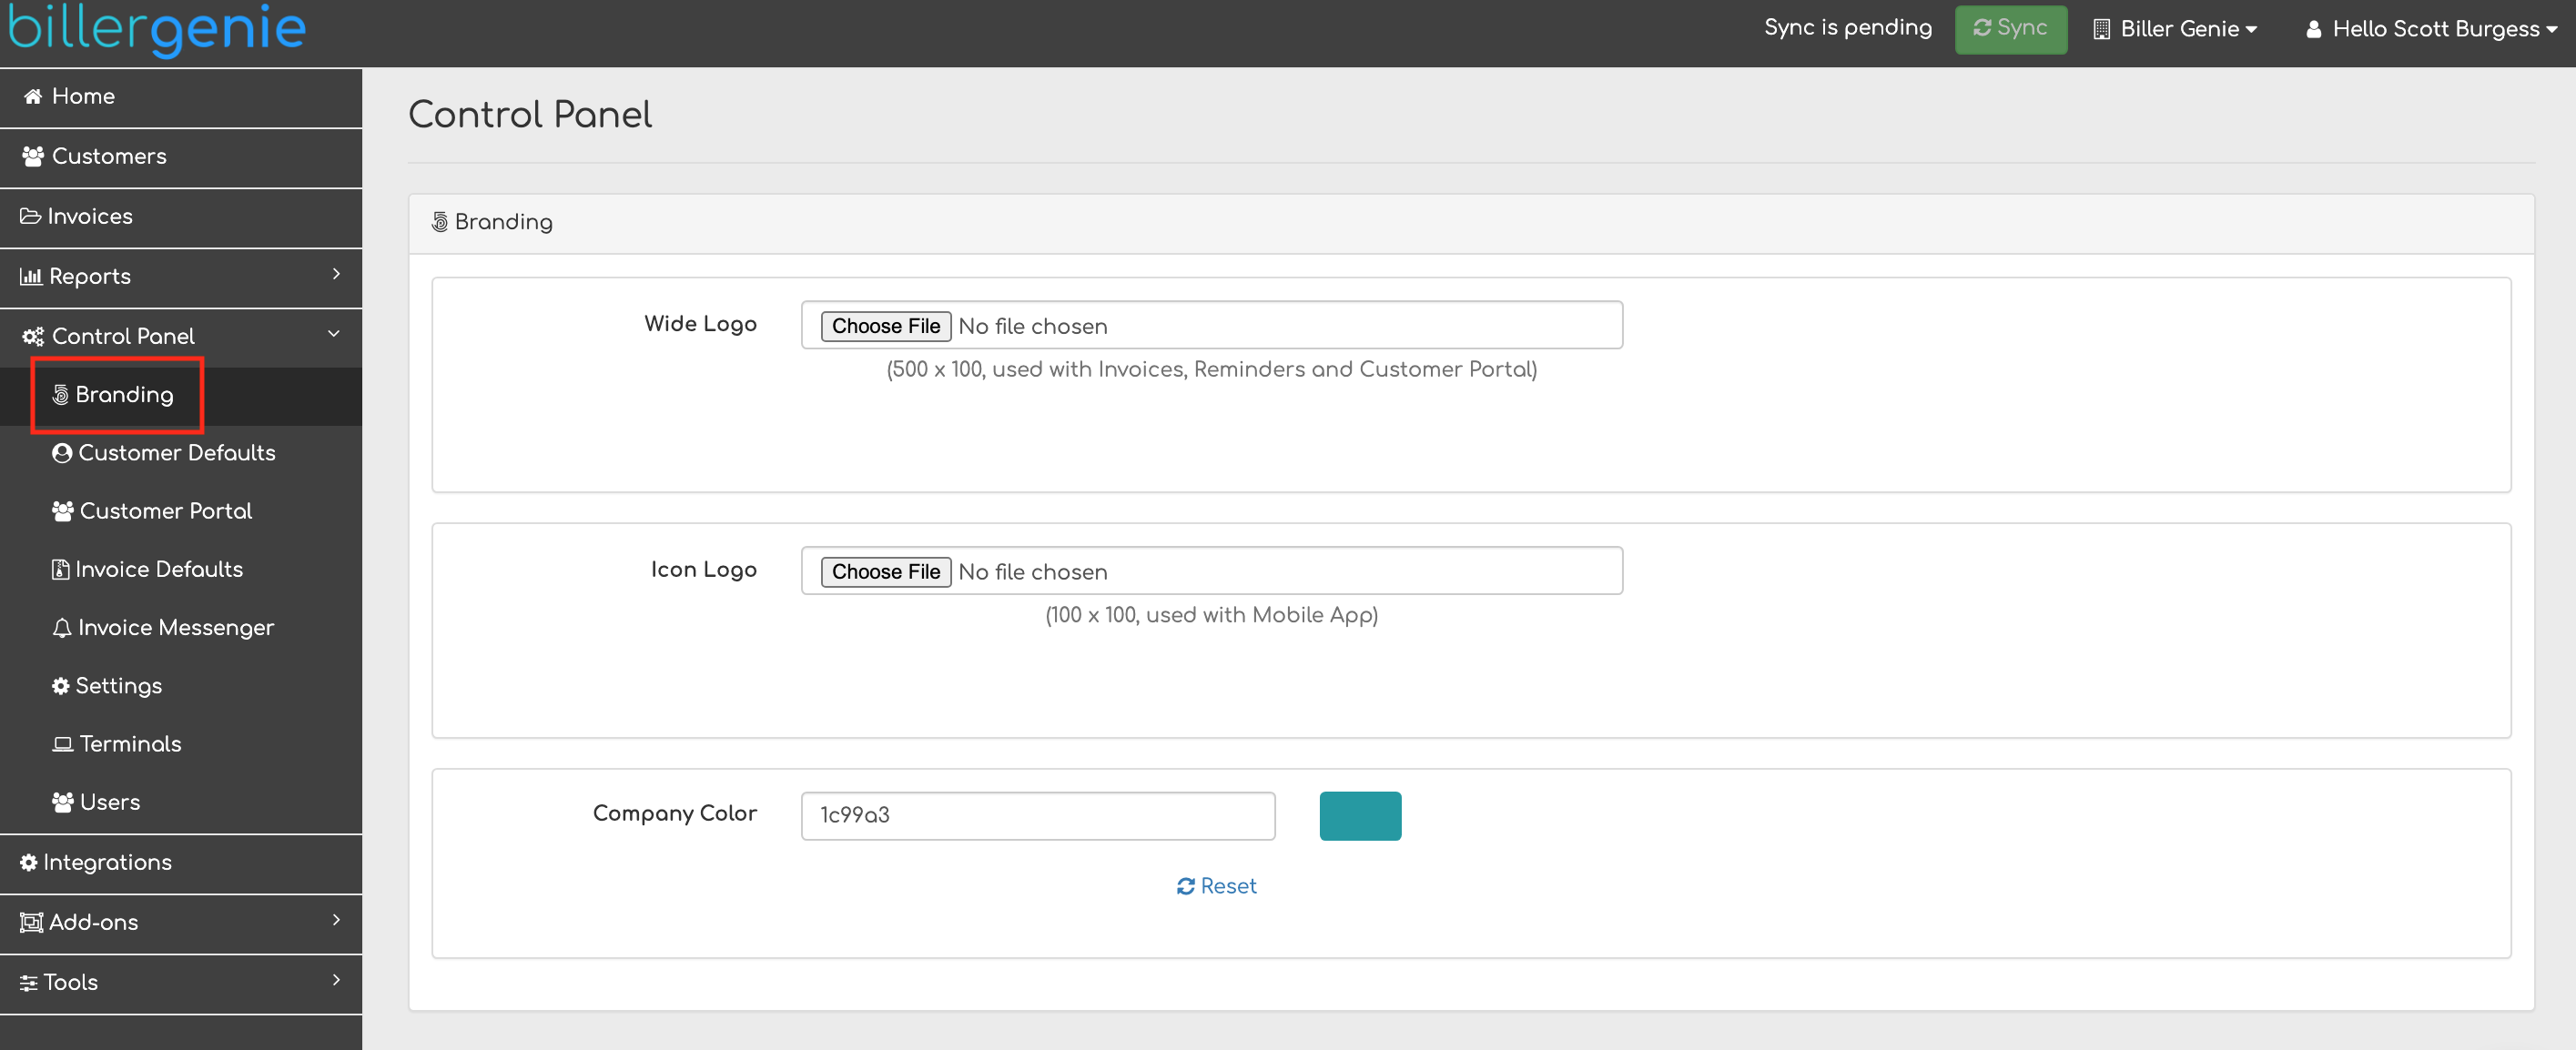
First, navigate to Control Panel > Branding.

Wide Logo - Step 2
Click Choose File and search for the image you would like to use.
Note: We recommend a .png file for the best look. It should ideally be sized to 500 x 100. You can resize within the app in Step 3.

Wide Logo - Step 3
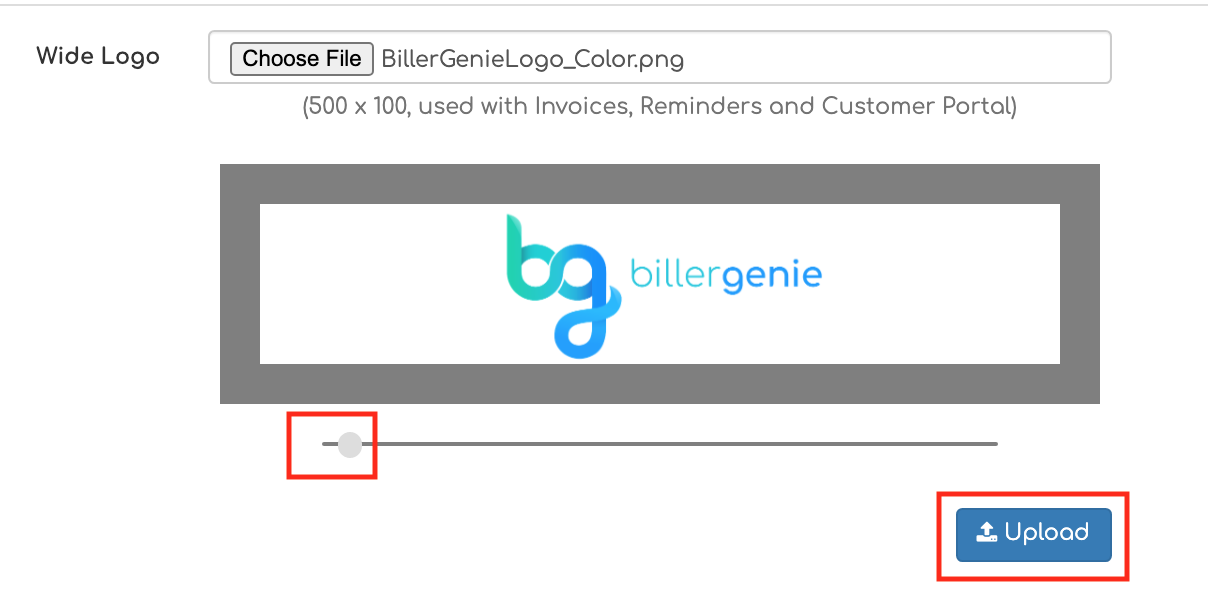
Use the slider to ensure the logo fits inside the box. Click Upload.

Icon Logo - Step 1
This logo will be displayed on mobile apps.
Click Choose File and search for and select the logo you would like to use.
Note: We recommend a .png file for the best look. It should ideally be sized to 100 x 100. You can resize within the app in Step 3.

Icon Logo - Step 2
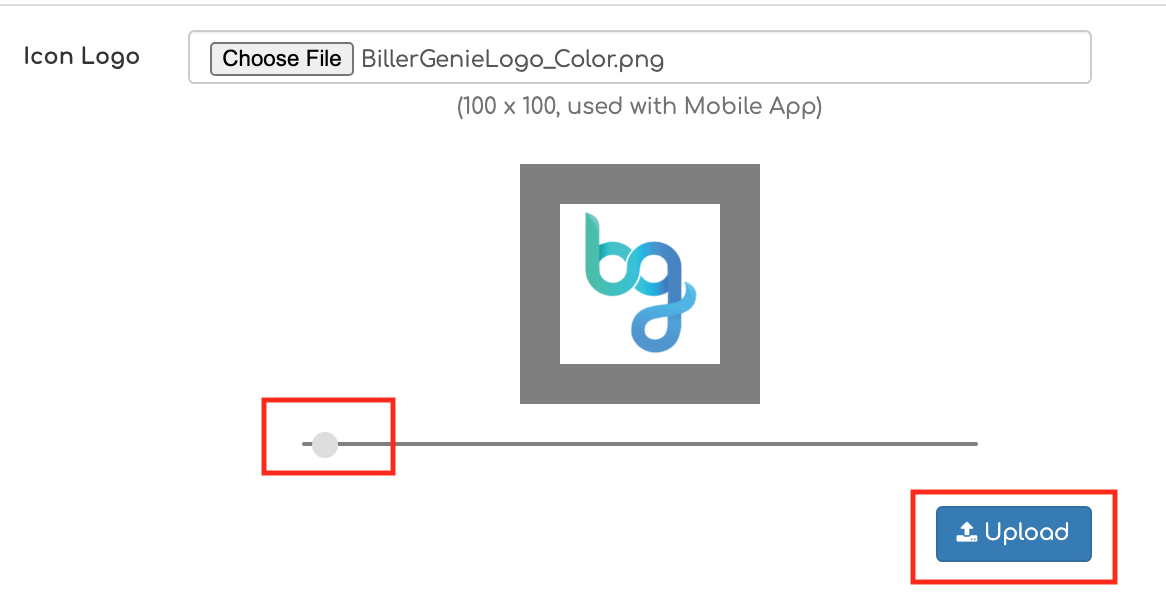
Use the slider to ensure the logo fits inside the box. Click Upload.

Company Color - Step 1
This color will be used on your invoices, reminders, and within the customer portal.
Click the Company Color input field

Company Color - Step 2
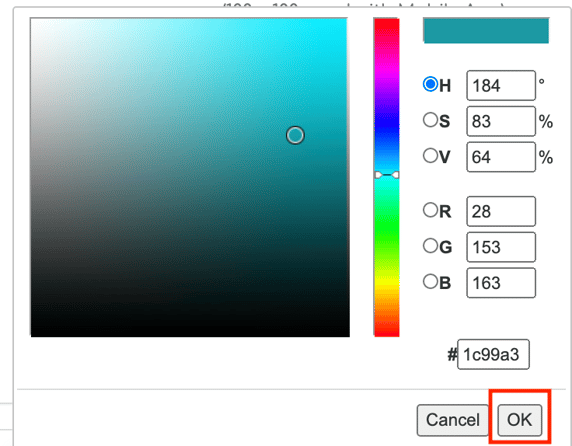
Select your company color. You can select it in four different ways:
- Entering the HSV values
- Entering the RGB values
- Entering the HEX code
- Dragging the slider to match your colors
Once you have made your selection, click OK.

Company Color - Step 3
Once you have made your color section, click Update.
