Installing QuickBooks Desktop (for Versions 2014 to 2021 R3)
Table of Contents
Before getting started, check to make sure that the QuickBooks Desktop version is supported for integration with Biller Genie.
Supported U.S editions of QuickBooks Desktop:
- QuickBooks Enterprise Solutions (2015 – 2021 R3)
- QuickBooks Premier (2015 – 2021 R3)
- QuickBooks Pro (2015 – 2021 R3)
Pro Tip:
- If the QuickBooks file is saved on a local computer, the installation should take place on that computer.
Installation & Syncing
Step 1
Log into the Biller Genie merchant portal.
Step 2
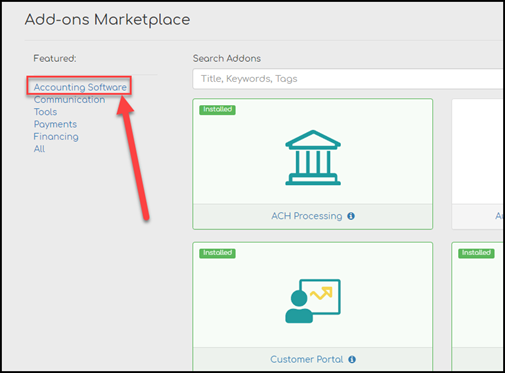
Click on Add-ons Marketplace in the left side menu.
Step 3
Click Accounting Software in the feature list on the left.
Step 4
Click QuickBooks Desktop Versions 2014 to 2021 E3.

Step 5
Install the app.

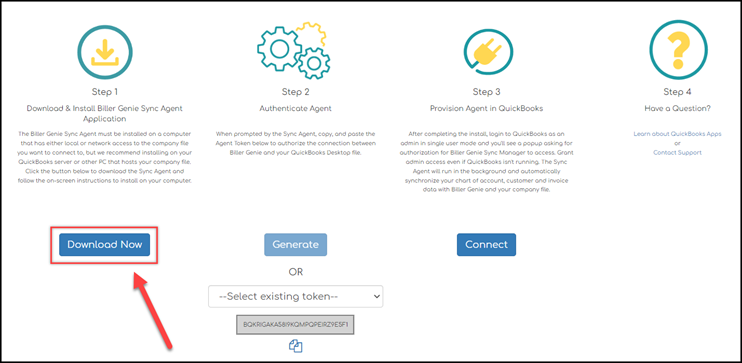
Step 6
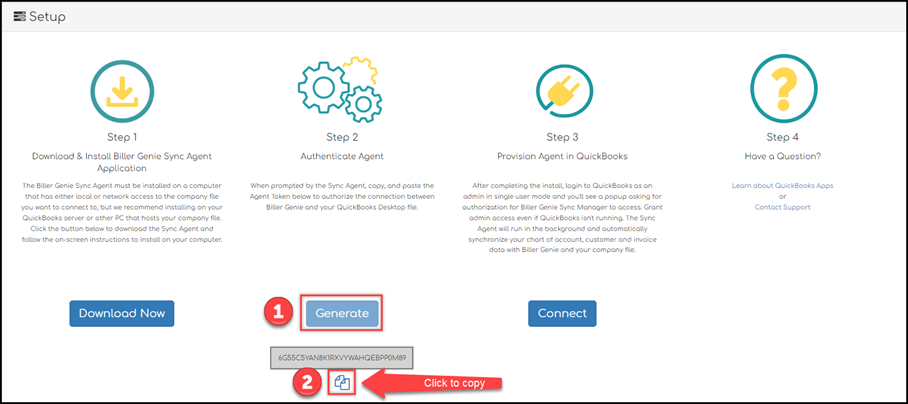
Once the add-on is installed, click the blue “Download Now” button under step 1. This will download the to start the installation process for the the Biller Genie Sync Manager onto the computer where the company file is stored.
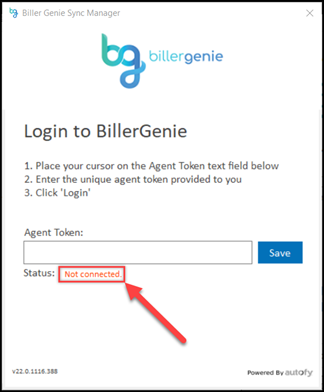
Step 7
Once the Biller Genie Sync Manager has been successfully installed on the computer, it will display that it is not connected.
Step 8
Go back to the QuickBooks Desktop add-on in Biller Genie and click the blue “Generate” button under setup step 2. An agent token will be generated. Click the button below the token to copy it to the clipboard.
Step 9
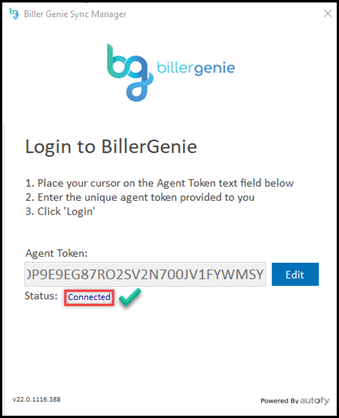
Navigate back to the Biller Genie Sync Manager App, right click and hit paste in the empty “Agent Token” field in the middle of the App. Then click the blue save button to the right of the pasted token. The Biller Genie Sync Manager will use the token to connect to QuickBooks Desktop. The Biller Genie Sync Manager App status should update to “Connected” when it is ready to be used. It may take a couple of minutes for the status to change from logged in to connected.
Step 10
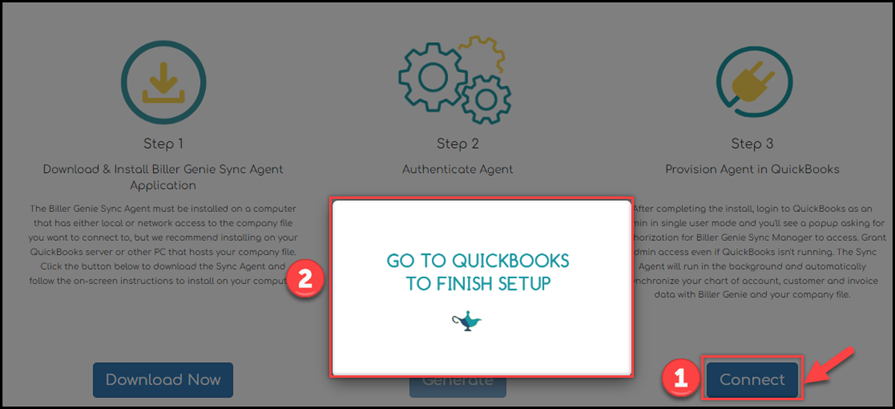
Now that the Biller Genie Sync Manger App is connected, navigate back to Biller Genie. Click on Add-ons, then click on QuickBooks Desktop. Under setup step 3, click the blue “Connect” button to prompt Biller Genie to connect with QuickBooks Desktop for the first time. As the first connection is happening, a small pop up window will appear to navigate back to QuickBooks Desktop to finish the setup process.
Step 11
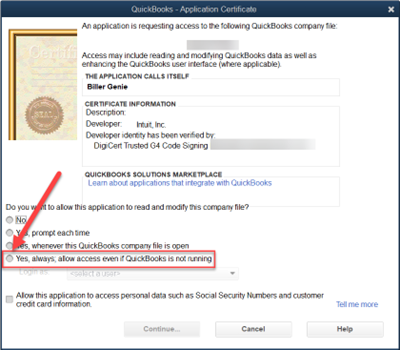
Open QuickBooks Desktop and there should be a “Application Certificate” pop up on the screen. The next few steps will give the Biller Genie Sync Manager the authorization to connect with the QuickBooks Desktop Company File. In the application certificate screen, check the third box that says “Yes, always; allow access even if QuickBooks is not running”.
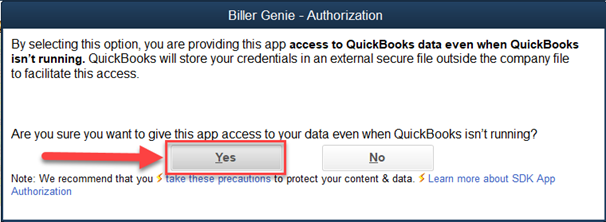
Step 12
After checking the third box in the application certificate screen, a small authorization screen will pop up. Click “Yes” to proceed.
Step 13
After clicking yes in the authorization pop up, the “Application Certificate” screen will open again. Click the drop down under “Login as” below the third option chosen previously and choose the QuickBooks Desktop admin user. Then click continue. The admin user needs to be chosen here to allow Biller Genie to sync automatically even when QuickBooks is closed. If another user is chosen here, it may prevent successful syncing from occurring.
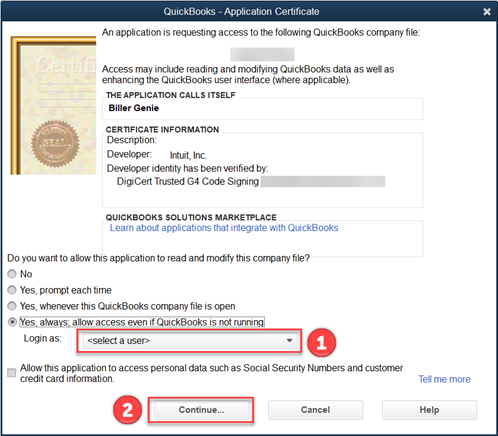
Note: If there is only one QuickBooks Desktop user and it is the admin, there will not be a drop down to choose a user as only one user exists in QuickBooks.
Step 14
After clicking continue in step 12, a “Access Confirmation” dialog box will open. Click done to confirm the chosen user from the previous step.
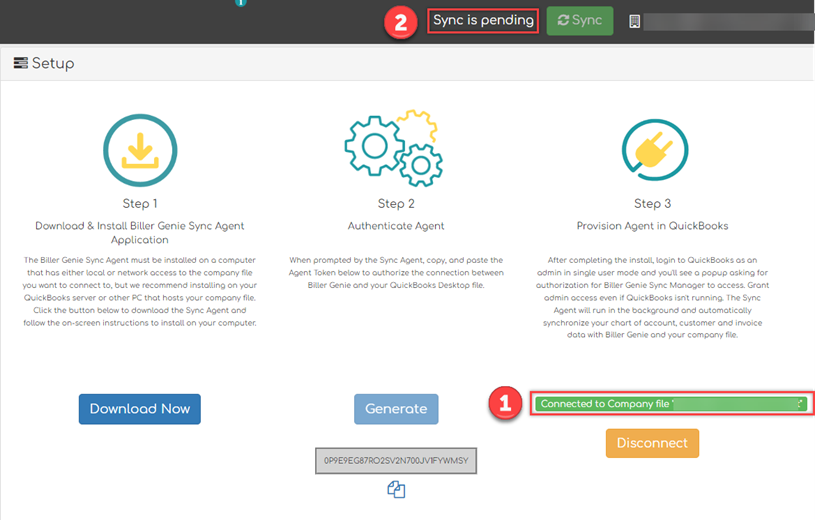
Step 15
Navigate back to Biller Genie and the QuickBooks Desktop add-on screen should show that it is connected to a company file and a sync is pending. The sync should start shortly. Refresh the browser (Sometimes it takes 5 – 10 minutes), and the green sync button will start to spin as it is starting the process of syncing.