Installing the PayPal Add-on
Step by step guide to enable PayPal within Biller Genie.
Table of Contents
Integrating PayPal to your existing Biller Genie checkout experience allows your customers to pay with their PayPal balance, Pay Later, and Venmo.
To learn more, read our article: PayPal Overview, or follow the steps below to get started!
Before starting, make sure you have your login information for:
- Biller Genie
- PayPal
Step 1
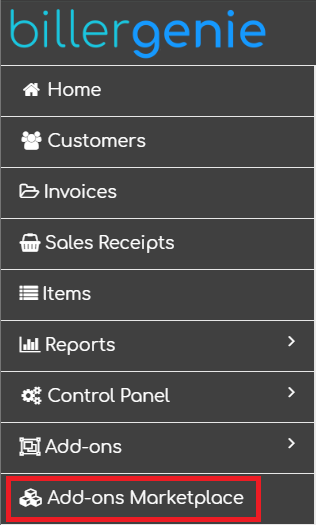
Within the Biller Genie Portal, navigate to Add-ons Marketplace

Step 2
Narrow the results by selecting the “Payments” category, or use the search function by typing “PayPal.”
Click the tile for PayPal

Step 3
Click ‘Install’

Step 4
Click 'Sign into PayPal'

Step 5
Enter the Email address and password associated with your PayPal account.
Once connected, Biller Genie will display “You're currently connected!” and you'll have the option to disable any of the PayPal products, if you wish.

Connecting PayPal will automatically enable PayPal products for all customers. However, like all payment methods, PayPal can be disabled within the Control Panel and/or at the individual customer level.
To disable for all customers: Navigate to Control Panel > Customer Defaults. Under the General tab, there is a Yes/No switch labeled ‘Allow APM Payments’ (APM = Alternate Payment Methods), this will enable or disable PayPal for all customers.
To disable for select customers:
Option 1: Turn PayPal OFF globally, and then turn it ON for certain customers.
Option 2: Turn PayPal ON globally and then turn it OFF for certain customers.
Once you've selected the option that works for you, adjust your global setting, then open the first customer who needs to be adjusted. Under Advanced Options, you have the same APM toggle that allows PayPal to be allowed.

You are now ready to accept PayPal payments directly inside the Biller Genie software!